Brownies From Scratch

22 Jun

Cooking with Commandant M. Stewart.

Part I. (Battle Brownies)

So, we all know who Martha Stewart is.  She’s  almost like a military leader in the field of baking and home ec type things. (does any school even have home ec classes? If so, can we sign up?) What you probably don’t know is that she drives C insane.

C tends to be an “Act First, Think Later” type. She’s not what one would call super organized. Or meticulous. When she wraps things, she tends to use more tape than wrapping paper. When she bakes, it usually takes two full loads of the dishwasher, a mop, a broom, and Windex to make the kitchen safe for ordinary humans again.

K, on the other hand, would clearly be promoted to a high rank in the Commandant’s army. Although she is capable of causing her own share of chaos, she is an amazing painter, and has yet to be bested by any sort of arts and crafts type activity. In fact, K has the special talent of making even accounting look pretty.

But C wanted to prove that she too could join the Martha Stewart Army, if she really wanted to. So, she found a recipe for homemade brownies and got to work. But, first, she called the other half of the team. Following is a REAL C and K conversation

C: “I’m making brownies from scratch”

K: “It’s really not that hard.”

C: “LIES! Besides, they’re Martha Stewart Brownies. That makes them way harder.

K: Umm…Sure. I’m going to go make chocolate cappuccino cheesecake from scratch.

Regardless of K’s calmness, C did find the brownies challenging, and she almost gave up about thirty times. However, she managed to get them in the oven with only minimal destruction of kitchen property, and the results were so worth it.

The recipe was slightly less terrifying than C feared. In fact, the trickiest part came from prepping the pan with parchment paper. As much as we wish we could tell you to skip that annoying step, it really did improve the taste of the brownies, and made it way easier to actually get the brownies out of the pan. Everyone’s had that time they’ve slightly over-cooked the brownies and had to chisel them out of the pan, right? Well, Commandant Stewart has a way to avoid that. And, it actually WORKS.

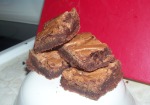
These may be some of the best “standard” brownies ever. Seriously, if you’ve only ever had brownies from a box, you need to make these. This instant. The result is well worth the battle.

Speaking of which, Commandant, can I please be in your army now?

Battle Brownies:

Adapted from this Martha Stewart Recipe (link)

Makes one 9-by-13-inch brownie

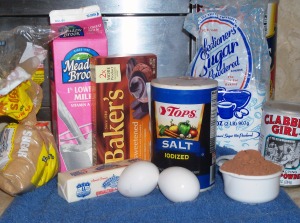
Ingredients

9 tablespoons unsalted butter, softened, plus more for pan

1 and 1/3 cups of semisweet chocolate chips (or 9 oz of chopped semisweet chocolate)

1/3 cup unsweetened cocoa powder

1 cup all-purpose flour

1/2 teaspoon baking powder

1/4 teaspoon salt

1 1/2 cups sugar

3 large eggs, brought to room temperature

1 TABLESPOON pure vanilla extract

½ cup mini chocolate chips (optional)

Also optional: Helmet, shield, barricade, barbed wire. You know, standard battle supplies.


Directions

1. Gird your loins and preheat oven to 350 degrees.

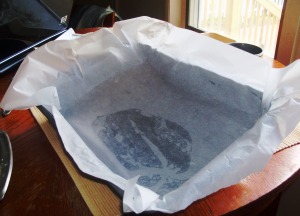
2.  Attack the pan. By this, I mean, butter the 9-by-13-inch cake pan. Then, cut your parchment paper to a piece about three inches too big on each side. Now, start fighting with that paper to get it to lie flat. I found one of the best way of keeping it down to press all along the long sides of the pan first, and then the short sides. Still, my results weren’t too pretty.

Once you’re done fighting with the pan, make sure to butter the parchment paper too. Because butter makes everything better.

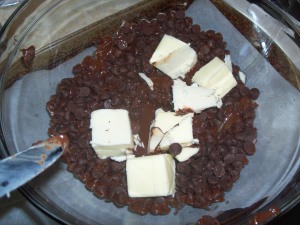
3. Next, Martha recommends placing the butter, chocolate, and cocoa in a double boiler and stirring until butter and chocolate have melted. Let cool slightly.

C used a microwave. It made a bigger mess than the double boiler would have, but we pride ourselves on not needing a fancy double boiler, and also, this blog isn’t called Our Kitchen’s CHAOS for nothing. So, if you want to follow our messy footsteps, first melt the chocolate chips for about thirty seconds on low and then add in the butter. Microwave again, on low, for thirty seconds and stir. Repeat until mostly melted, then stir in the cocoa powder and finish melting in the microwave.

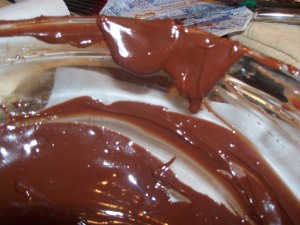
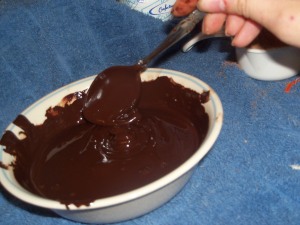
Chocolate And Butter....Perfect.

4. Whisk flour, baking powder, and salt in a bowl.  (ha. See!  A simple step)

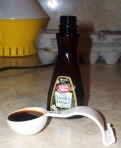
5. In a large bowl, combine sugar, eggs, and vanilla; beat at medium speed until light in color and smooth, about 4 minutes. Make sure you use a full TABLESPOON of vanilla, not a teaspoon.

This Is Historic. A TABLESPOON

6. Stir in chocolate mixture. Reduce speed to low, and mix for about a minute or until incorporated. Add flour mixture; mix until just combined. If using chocolate chips, mix those in too.

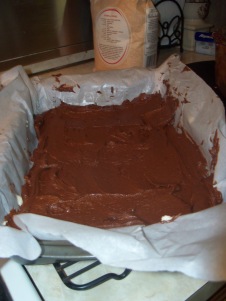
3.            Spread batter evenly into the pan. This can be a bit of a challenge. We recommend using a long handled large serving spoon to drop dollops of batter everywhere, and then using a butter knife to smooth the top. Now, breathe a sigh of relief. The tricky part is over.

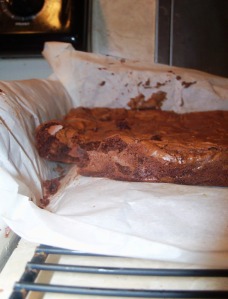
4.  Bake until a fork inserted into center comes out with only a few moist crumbs attached, 35 to 40 minutes. (Ours was ready at 32 minutes, but ovens may vary. We recommend checking at about thirty minutes)

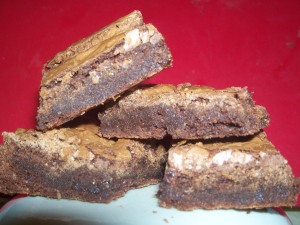
Now, be patient and let cool in dish 30 minutes. Then, carefully holding the paper lift it out, and let cool completely on wire rack. Lining the pan  gives each brownie a perfectly firm crust on the bottom, while still keeping the middle very fudgey. All these different textures makes the brownies a very addictive treat. You will not be able to eat just one of these, we promise.

These brownies are so smooth, and rich. They taste like what box-mix brownies dream of being. They have a  velvety interior, and a perfectly flaky crust. At least this time, C cedes to Commandant Stewart’s mastery of the kitchen. Now, go out and make these, fellow baker-soldiers!
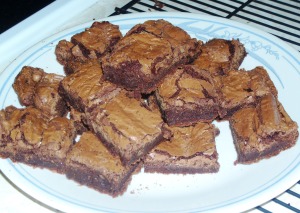
C’s rating: 5/5. Perfect. Couldn’t ask for a better brownie.

Do you also want to join the M. Stewart army? Are you already a member? Do you have a better brownie recipe? Let us know in the comments!

Rum-Raisin Oatmeal Cookies

17 Jun

Spicing up a grade-school favorite.

There’s a hobby going around.  It’s called taking-something-we-grew-up-with-and-adding-booze-to-it. Okay, so the name is a little long-winded, and we may have never heard anyone use that exact term, but we’re sure all the cool kids say it.

Then again, on any given Friday night, you can usually find us in a kitchen…not out at a bar. So, maybe the cool kids aren’t saying it.

Whatever, we think we’re pretty cool. Maybe if bars offered spoonfuls of cookie dough we’d be more likely to go.

But, when C was thinking of making Oatmeal Raisin Cookies, she thought back to this trend, which has led to vodka whipped cream and My Little Pony drinking games, and decided to add a certain “mature” aspect to her cookies. (hint, it rhymes with party)

Bacardi.

(Also, we wish we had been first to come up with that rhyme. Sadly, we’re not. We borrowed this list from Poplicks.com to further illustrate the point.)

TOP 10 SONGS THAT RHYME “BACARDI” WITH “PARTY

  1. “It’s My Life” – Mariah Carey
  2. “The Jump Off” – Lil’ Kim feat. Mr. Cheeks
  3. “You Be Illin'” – Run D.M.C.
  4. “Where The Party At” – Jagged Edge feat. Nelly
  5. “In Da Club” – 50 Cent
  6. “Get Ur Freak On (Remix)” – Missy Elliott feat. Twista
  7. “Thug Lovin'” – Ja Rule feat. Bobby Brown
  8. “Triple Trouble” – Beastie Boys
  9. “Jack The Ripper” – LL Cool J
  10. “Don’t U Know” – ODB feat. Killah Priest

So, now that you have a playlist to listen to while bakin, we suggest you pour yourself a drink (it’s okay if it doesn’t rhyme with party. We Chaos Kitchen girls suggest things that rhyme with bilk, (real word, by the way. It’s on the SAT) and Floffy (not a real word)), and make these cookies. They are only a bit more work than a standard oatmeal raisin cookie and well worth the effort.

Rum Raisin Oatmeal Cookies

Preheat oven to 350°F

2/3 cup light brown sugar, packed
1/2 cup (1 stick) butter, softened
1 large egg
¾ teaspoon vanilla extract

3/4cup all-purpose flour
1/2 teaspoon baking soda
3/4 teaspoon ground cinnamon
1/4 teaspoon salt
1 3/4 cups rolled oats (not instant)
1 cup raisins
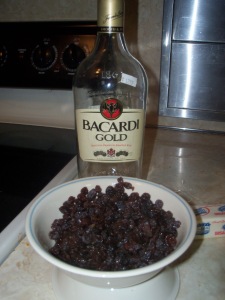
About half a shot of rum (We used Bacardi Gold)

To prepare the rum raisins: Mircowave the rum for about a minute, or until hot. Dump the raisins into the hot rum, and stir to coat all raisins with the rum. It’s important to only use a small amount of rum, or else you’ll end up with really soggy raisins. Set raisins aside to soak.

Combine butter and brown sugar in a large bowl. Cream until smooth, at least two minutes.

Then, add in the egg. Mix well. After adding the egg, pour in the vanilla and mix until just incorporated.

In a smaller bowl sift together  flour, cinnamon, baking soda, and salt. Whisk until well blended.

Add the flour mixture to the butter mixture in two additions, stirring with a spoon after each addition.

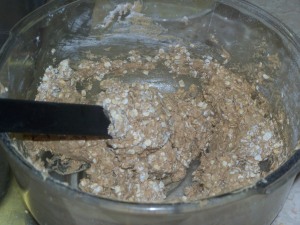
Then, after mix is well incorporated, pour in the oats and stir until just blended.

Finally, dump in the raisins, including any rum at the bottom of the bowl.

Now, firmly seal the dough, and chill it for at least two hours. The longer you chill your dough, the thicker and chewier they’ll be.

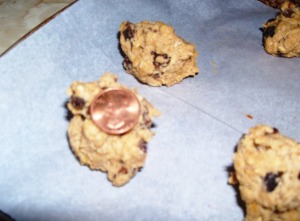
Then, drop cookies by rounded teaspoon on parchment paper lined cookie sheet.

Bake between 7-10 minutes at 350°F, or until edges are golden brown but top of cookies are still a bit soft looking.

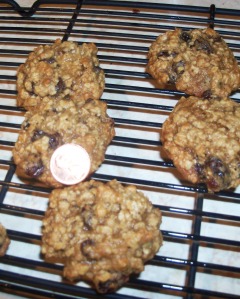
Let set on pan for a couple minutes, then transfer to cooling rack.

Makes about 3-4 dozen small sized cookies.

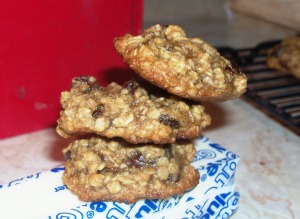
These cookies are the best Oatmeal Raisin C’s ever had. The rum  adds sweetness and flavor, without making the cookies taste like a big pile of alcohol. The cookies are also really chewy and thick, just like any oatmeal cookie should be. But unlike some cookies, they aren’t too chewy, so they still taste sweet, and not like a granola bar.

C’s rating 5/5 stars

Melting Chocolate

10 Jun

Melting Chocolate:

Without  Fancy-Schmancy Stuff

Melting chocolate is one of those baking tasks that really isn’t that difficult. However, there are a few things that can go wrong, and also, we chaos kitchen girls have a few tricks that might make the job way easier for you.

Most importantly, you don’t need a double boiler. Honestly. No matter what any fancy-schmancy cookbook tells you, we promise you can do just fine without one. At least, for melting chocolate. We have heard rumors of things called, “vegetables” that need to be cooked in a double boiler, but we doubt these strange, “veggies” really exist.

We’ve certainly never seen one in OUR kitchen.

Anyways, what you need is a microwave and a microwave safe bowl.

And chocolate. (Duh)

How to Melt Chocolate:

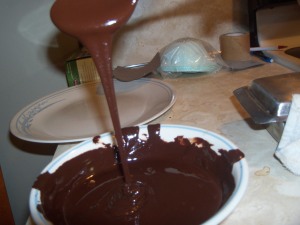
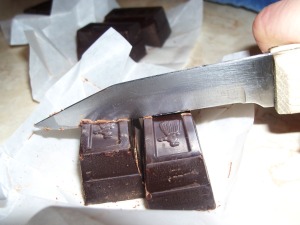
1. Cut the chocolate into smaller pieces, using a large, sharp knife. Keep all the pieces about the same size. Keeping it all about the size of dice ensures a more even melting. Also, if you cut the chocolate too fine, its easy to lose some of it. Which would be very sad.

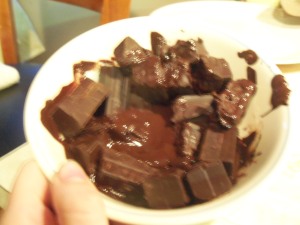
2. Put chocolate in microwave safe bowl, and then microwave it for one minute at medium heat. Pull bowl out, and stir. Even if the chocolate doesn’t look melted, try to stir it around. Sometimes the  bottom melts before the top.

3.  This time put the bowl back in for only thirty seconds, remove, and stir again. Remember, you don’t want your chocolate to boil, so always check to make sure it’s not getting too hot.

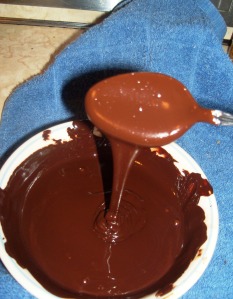
4. Repeat step three as necessary, until you have smooth, melted chocolate. Tada! No double boiler needed.

Final bits of advice.

-Keep water away from melting chocolate. Dry everything, spoon, bowl, your hands, before it touches chocolate. Water causes chocolate to “seize” which is fancy baker-people speak for…ugly non-melty chocolate.

-If you’re using those “chocolate” melting discs, first of all, you should know they are more waxy materials than chocolate, and secondly, the instructions are slightly different. Follow the directions on their packaging.

-If your microwave usually cooks very hot, reduce all time given in this advice by half.

-No matter how yummy it looks, don’t try and eat melted unsweetened chocolate. We both have. We then both drank a lot of  our favorite beverages. (C’s=coffee. K’s=milk. Why? What beverage were you thinking we keep on hand in the kitchen?)

-To chop chocolate, firm downwards pressure with a sharp knife works really well. Don’t saw back and forth.  That increases bits of chocolate dust, which makes a mess and makes it harder to microwave.

WRONG

RIGHT

Some of our Recipes that Use Melted Chocolate:

Marbled Chocolate Peanut Butter Cookies
Cocoa Bombs

Cocoa-Bombs

9 Jun

It’s summer, which sadly means that the dynamic duo of disastrously delicious delicacies have to go to their separate homelands, or homestates. Homelands sounds far more dramatic though. However, we will most assuredly keep baking, and keep posting our recipes for you.

But, since this separation is quite tragic, C had to console herself with chocolate. Lots of chocolate. She knew that K also was probably quite sad her baking friend had left, so C decided to make the perfect cookies to mail K.

They had to be chocolate. That was a given.

But they also had to ship well, and not melt in the unseasonably hot late-May weather our area was experiencing.

And, of course, there was a little competitive devil on C’s shoulder, urging her to prove that she could still bake without the help of K.

All of this lead to her deciding on a variation of these (http://www.marthastewart.com/281209/chocolate-crackle-cookies), where she refrigerated the dough longer to make a denser, thick, cookie that wouldn’t break in shipping.

Cocoa Bombs

A Chaos in the Kitchen Original

Ingredients:

8 oz bittersweet chocolate, melted and cooled
1 1/3 cups flour
1/4 teaspoon salt

1/2 cup cocoa powder
2 teaspoons baking powder

8 tablespoons (1 stick) unsalted butter, room temperature
1 1/3 cups light-brown sugar, firmly packed
2 large eggs
2 teaspoons pure vanilla extract
1/3 cup milk ( we used skim but any kind works)
approximately 3/4 cup confectioners’ sugar

Directions:
Melt chocolate (see HERE for more detailed directions)  Set aside to cool.

Sift together flour, cocoa, baking powder, and salt.

The Importance Of Sifting

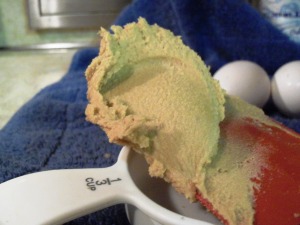
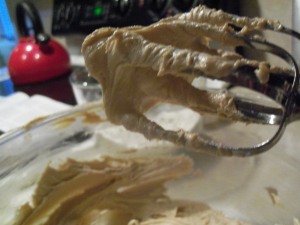
In a large bowl, beat butter and light-brown sugar on medium speed, with an electric mixer until creamy and light colored. It will be thicker than if you were making chocolate chip cookies, due to the lack of white sugar. It kinda looks like really smooth peanut butter at this stage.

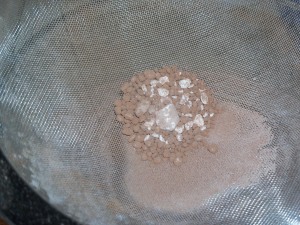
Add eggs and vanilla, and beat for about another minute. Add melted chocolate. With mixer on low speed, alternate adding dry ingredients and milk until just combined.  This dough gets seriously thick. You will need a spatula and serious arm muscles to finish mixing the dough.

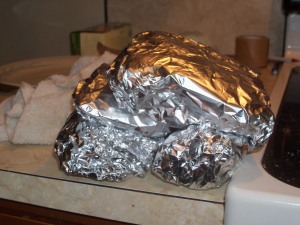
Divide the dough into quarters, wrap with waxed paper and tin foil OR plastic wrap, and chill in the refrigerator until firm, about 2 hours. For thicker cookies, chill overnight. As this picture clearly shows, I am not good at evenly dividing the dough. Each packet is a completely different size and shape.

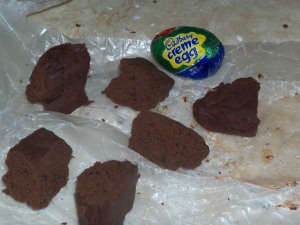
Pour confectioners’ sugar into a small bowl. Cut each dough log into 1-inch pieces. The dough should be very firm at this point in time. Yes, that’s a Cadbury full sized egg C used for size comparison. We TOLD you she’s been eating a lot of chocolate without K around…(Not that K ever kept her from chocolate. If anything, K was like a chocolate dealer. Hot chocolate, chocolate ice cream, chocolate cookies…pick your poison and we bet K can supply it.)

Toss the pieces in the confectioers’ sugar.  Using your hands, roll each piece into a ball, and then toss in sugar again to coat the cookie. Place the cookies 2 inches apart on a parchment paper lined baking sheet.

Bake until firm to touch, but not crispy-approximately 10 minutes. Remove to cooling rack and sprinkle with more confectionery sugar. (See note below.)

Makes about five dozen.

The background cookies have fresh confectionery sugar sprinkled on them after they came out of the oven. That sad looking fellow in the front…didn’t get any. For obvious reasons, we recommend the extra sugar.

These cookies are intense. There’s a reason we call them cocoa-bombs. They aren’t exactly sweet, nor are they overwhelmingly chocolaty. However, without chocolate chunks, they do ship very well, as K can attest. These cookies, with their yummy dark chocolaty taste, are also aaaaamazing with a morning cup of coffee. Or a morning gallon of coffee. Same thing, really.  But if you’re looking for a very sugary, sweet cookie, we don’t recommend these.

C’s rating: 4/5 stars

K’s rating: 4/5 stars

Red Velvet Chocolate Chip Cookies

25 May

Devil Cookies

C Experiments with Cake Mix Cookies

C used to be a cross-country runner. In fact, going for runs is one of the only ways she can justify eating ten million baked goods per day. Well, that and blog research. See? She FORCES herself to eat TERRIBLE things just so you, dear readers, can see this blog. It’s a very, very difficult undertaking…suffering through all those pounds of chocolate and butter…it’s basically torture.

Anyways, this is not a post about running. This is a post about new places.

See, when C was a cross-country runner, she would always do much better on the courses she had run before. Running through a new 5-k, although fun, was always a little stressful, and the chance of taking a wrong turn was always higher.  And then there was the time her team got lost on top of a mountain…but we won’t talk about that.

Cooking in a new kitchen is a bit like that. C visited her friend, F, who offered to bake cookies with her. F didn’t realize what this entailed. You see, F is a normal human, who doesn’t like…well…chaos in her kitchen. F’s favorite cookies, in fact, are “cake mix cookies.” (These, in case you haven’t heard of them, are cookies made from a few quick alterations to the cake mix of your choice, saving you the hassle of combining flours and cocoa and whatnot.)

The idea of these cookies confused C for a bit as she is used to making things from scratch. Seriously, by the end of the year, C will probably try to make chocolate chips straight from the bean. So, adjustment one was a “cake mix cookie” recipe.

F has a lovely kitchen, including a really nice gas stove, and an awesome island-type thing with wheels. C kept pretending she was on a baking TV show. But, C is also used to an electric stove, which would cause problems in the baking of these cookies. Adjustment two was learning that the temperature of each side of the oven differed.

Also, F doesn’t believe in butter…or really even any sort of oil…and refuses to be converted to the buttery, greasy way of life.  (The fact that F puts up with C’s constant pestering is a testament to how awesome F is.) F recommends, instead of oil or butter, to always use applesauce. C almost died at the thought. So, that was adjustment three.

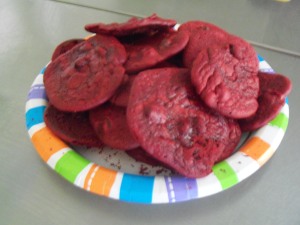
In short, these adjustments, well, led C to be lost in the woods, er, the kitchen, where F had to console her and promise that by the third pan into the oven the cookies would be fine. And they were. Granted, they were bright red and VERY sweet, but C survived a new kitchen, and now has a simple, yummy recipe under her belt.

DEVIL COOKIES

(Red Velvet Chocolate Chips Cookies)

Preheat oven to 350°.

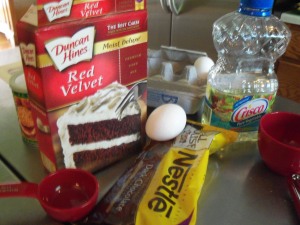
1 box Red Velvet cake mix

2 eggs

1 teaspoon vanilla

1/3 cup vegetable oil (or applesauce)

1 cup dark chocolate chips

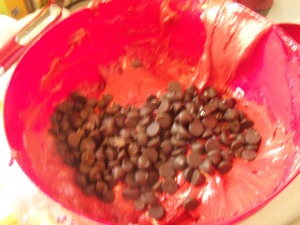
Combine cake mix, oil, eggs, and vanilla, and mix, until about the consistency of thick brownie batter. The red color will be very vivid. Don’t be scared. Stir in chocolate chips.

They Are Redder Than the Bowl, Seriously.

Chill for 2 hours.
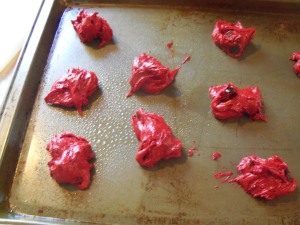
Roll into small balls and bake at 350° for 6-8 minutes. These cookies will spread.  A lot. So be prepared, and make sure to have your cooling rack ready.

Makes about 30 cookies. Unless you’re C…and you ruin the first two batches. Please, don’t be like C. At least in this. She’s a lovely role model for life goals such as procrastination and learning the words to every song ever on the radio.

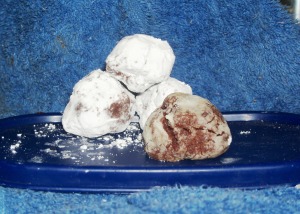
Devil Cookies!
C’s Rating: 2/5 stars. Very sweet…much like a cake, (obvi) but not a very intense flavor. Plus. The idea of a cake mix cookie put her into shock.

Guest Rater-F’s Rating: 3/5.  Difficult to roll into balls, and not a mind-blowing taste.

Simple Chocolate Glaze

23 May

To call this a glaze doesn’t really do it justice. When we hear glaze, we think of the clear, sweet topping poured on donuts and other breakfast desserts.

This glaze, on the other hand, is thick and chocolaty, almost like straight melted chocolate-with a little more “binding” ability that makes it perfect for cookie sandwiches.

In fact, C calls it an “easy ganache,” which isn’t a bad way to think of it.

Part 2

Ingredients:

Unsweetened chocolate, coarsely chopped

Semisweet chocolate, coarsely chopped

Unsalted butter

Strained confectioners’ sugar, spooned in and leveled

Boiling water, plus additional as needed

Light corn syrup

Pure vanilla extract

Melt the chocolates and butter in a shallow bowl set over simmering water, stirring until smooth.  Remove from the heat and add the sugar alternately with the water.  Stir in the corn syrup and vanilla.  Beat well with a wooden spoon.

Marbled Chocolate-Peanut Butter Sandwiches

15 May

Peanut butter cookies, at least in C’s opinion, are a bit lack luster.  Sometimes a plan old pb&j sandwich seems more savory than one of those tan, cross hatched cookies.

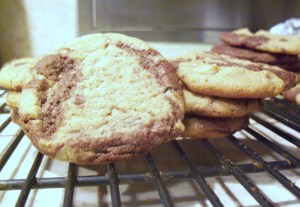
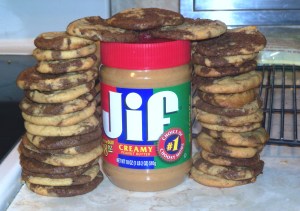
But chocolate AND peanut butter. That, friends, is a lovely, wonderful combination. These cookies feature a blended dough, where you add chocolate to half the already peanutbuttery dough.

The cookies are good on their own, very crunchy but not too sweet. However, if you want to up them to the next level, you can make cookie sandwiches with these, since they are so sturdy. Feel free to experiment with different fillings, like our chocolate glaze.

Oven Temperature: 350°

Ingredients:

1 cup all purpose flour

¼ teaspoon baking soda

¼ teaspoon salt

¼ cup (½ stick) unsalted butter, at room temperature

¼ cup smooth peanut butter

6 tablespoons granulated sugar

¼ teaspoon vanilla extract

½ teaspoon hot water

between 1/8 and 1/4 of a cup of bittersweet chocolate (or semi) melted and kept warm

1 large recipe chocolate filling (see part 2)

Part 1

Make the Dough:

1.  Strain together the flour, baking soda, and salt.  Set aside.

2.  With an electric mixer, mix the butter on medium-low speed.  When the butter is smooth and creamy, add the peanut butter and mix to thoroughly combine. Make sure it is combined, which may take over a minute.

Add the granulated sugar, then the light brown sugar and mix for 1 minute to incorporate.  Make sure to mix for the full minute, at least. Mix in the egg for 1 minute, scraping down the side of the bowl as needed. The dough should be thicker now, and able to form peaks.  Mix in the vanilla.

3.  Reduce the mixer speed to low and add the dry ingredients in three additions, mixing just to combine each addition.

4.  Remove ½ cup of dough and place in a wide, medium bowl.  Using a spoon, mix in the hot water, then blend in the warm melted chocolate.  You have some freedom in the amount of chocolate you can add, although, the more chocolate in the dough, it will be more difficult to keep the dough together.

Put the peanut butter and the chocolate dough next to each other, and gently blend with your hand or a knife, careful not to overmix because you would lose the marble effect.

Form two 1 ¼ inc diameter logs, being careful not to disturb the marbleization.  Wrap the logs with plastic, twisting the ends tightly to secure.  Refrigerate for 1 hour or until firm.  (This dough will keep in the refrigerator for up to 3 days or may be frozen for 1 month.)

Bake the Cookies:

5.  Position the shelve in the upper and lower thirds of the oven.  Heat the oven to 350°.  Lightly butter the cookie sheets.

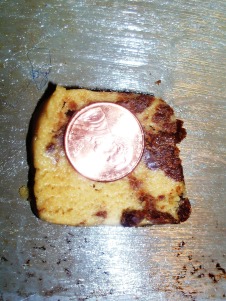
6.  Using a thin, sharp knife, slice the dough into 3/16 inch rounds, turning every two or three cuts to maintain the shape. C’s originally looked like triangles, so she shaped them into more of disc shapes.  Place on the cookie sheets about 2 inches apart.

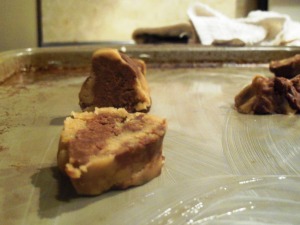
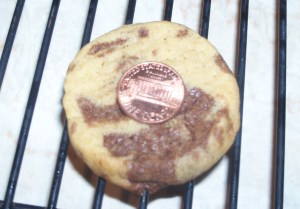
See lower pictures as a guide for how much the cookies spread.

Baked Cookie

Unbaked Cookie

7.  Bake for 8 to 9 minutes or until lightly browned.  To ensure even browning, toward the end of baking time rotate the sheets top to bottom and front to back.  Let stand for 1 to 2 minutes before loosening with a thin metal spatula.  Transfer to cooling racks.

These cookies are very crispy, but that also means they’re perfect for filling with frosting (or icecream) to make sandwiches. We recommend our simple chocolate glaze.

Browned Butter

15 May

Beurre Noisette

OR

HOW C. LEARNED TO STOP WORRYING AND LOVE BROWNED BUTTER

Sometimes, C feels a little bit pretentious. Just a bit. Just enough to make beurre noisette (please read that out-loud, with the most ridiculous accent possible.)

In normal people speak, that’s brown butter.

In even more normal people speak, that’s butter which has been melted long and slow enough for the milkfats to solidify and cook.

In stupid people speak, (aka C without any coffee in her bloodstream) it’s delicious-smelling, liquid butter.

This process was a little bit of an ordeal. It wasn’t difficult, really. It was just hard to follow internet directions, with such “helpful” bits of advice like, “if it’s too dark, its blackened butter, and you should not use it.” Or “cook until it smells wonderful.” All melting butter smells lovely. Seriously. If C could use it as perfume, she probably would.  This lead to C having many mild freakouts of “OH NO! IT’S BLACK BUTTER! IT’S RUINED” (that occurred about one minute into cooking this, which ended up taking about 20 minutes.)
She also thought about giving up many times. After all, how different could browned butter be from her other buttery loves?

But, the results were worth all the stress, and C is now in an open relationship with butter, clarified butter AND brown butter. She’s never been happier.

Anyways, we hope that this step by step guide will help you to love browned butter, and lead you to many delicious enterprises. (We recommend THESE)

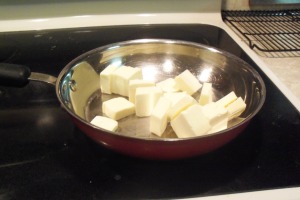
Cube butter into one inch pieces.

Heat a skillet on medium heat. Once it’s hot, turn heat down to low, and put butter into the skillet.

Melt the butter, while stirring with a whisk or fork, as you would for pouring on popcorn, or if you’re C, drinking out of a mug

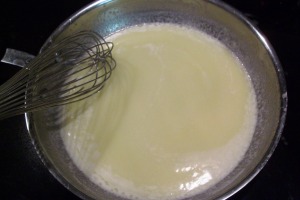
The white milkfats will float to the top, but DO NOT WORRY and keep stirring.

At some point in time, the butter will turn clear. Seriously, things will be fine, even though you can’t see any hint of that yellow color. DO NOT WORRY. Keep stirring.

Now, the butter will really start smelling good. If we could bottle the scent and send it to you, trust us, we would. It does smell faintly like nuts, but it mainly just smells good.

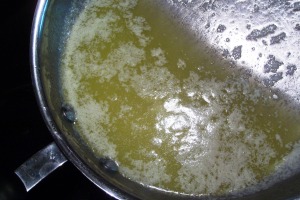
At this point in time, those milk fats, which before had been white before, are now turning brown and falling towards the bottom. It looks very ugly. Again, DO NOT WORRY. Keep stirring. This is a sign its getting close to the end. The butter should also be shifting in color, from the clearish yellow its’ been to a darker, amber hue.

As soon as C saw her first brown speck, C actually poured the butter out of the pan. But the melted butter was much more than the recipe called for, so she realized it had to go out of the bowl, back into the frying pan. (get it? It’s like a pun on out of the frying pan, into the fire. You can laugh. It’s okay. We know we’re funny….Please. Laugh. Or C will keep making puns.)

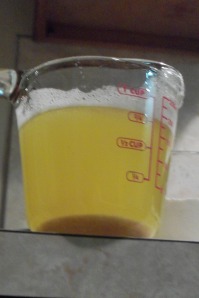
So, back into the frying pan the butter goes, until it gets a bit darker, almost caramel colored. Its better, your first few times, to make it on the safe side of not quite brown. You’ll get more comfortable with knowing when it’s truly browned, the more you make it. And trust us. Once you’ve made it, you’ll want it again. DO NOT WORRY.

Tada. You’ve made beurre noisette. Put on a beret, and open some champagne.

As for those little brown bits, opinions are divided on if you should put them into the recipe or not. We always do, but if you want a less nutty taste, you can strain them out.

Browned Butter Coconut Cookies

14 May

Chocolate Chip Cookies Get Fancy

C was at home, and after losing thirty-five straight games of battleship, felt the need to prove she had some sort of talent. So, like any good baker, she searched for the most complicated cookie recipe she could find. This recipe , from Joy the Baker, fit the bill; browned butter, toasted coconut, chocolate…sounded perfect.
It. So. Was.

These are without a doubt, the best variation of Chocolate Chip cookies C has ever had. The browned butter, which wasn’t that difficult to make, (although you can read about her worries while making it HERE ), added a lot in flavor, and the coconut was crunchy and sweet, without being overwhelming.

These cookies are a bit sophisticated, so we wouldn’t recommend them for kids, but everyone C fed them to was very happy with the cookies. Her brother, especially could not stop eating them.
One word of warning: bake these directly. C, after making (and eating) a couple batches, decided to give the poor oven a break (or herself a nice, sugar-coma induced nap) and put the dough in the fridge. It stiffened and crumbled. She tried, utterly heartbroken, to resurrect the dough, and managed a couple more batches, but they lacked a lot of the amazing taste of the first batches. We think the coconut may have soaked up the lovely, lovely brown butter.

In short. DO NOT REFRIGERATED THE DOUGH! YOU WILL CRY TEARS OF AGONY AND REGRET AT LOSING OUT ON EATING SOME OF THESE COOKIES.

Browned Butter Coconut Cookies

Preheat oven to 350 F
1 cup (2 sticks) unsalted butter, melted and browned to about 3/4 cup butter (Advice on browned butter, click HERE)
1 cup granulated sugar
3/4 cup brown sugar
1 tablespoon pure vanilla extract
2 ½ cups all-purpose flour
3/4 teaspoon baking soda
1/2 teaspoon salt
1 large egg
1 large egg yolk
½ cup toasted coconut See here for how to.
1 ½ cup dark chocolate chunks

Melt butter in a medium saucepan over medium heat, stirring constantly until browned. Remove browned butter from oven, pour into heatsafe bowl. Click HERE for more advice.
In a medium bowl, whisk together flour, baking soda and salt. Set aside.
Pour granulated and brown sugar into a large bowl. Add the brown butter and beat together, using a mixer, on medium speed, for about 2 minutes. The sugar may still look grainy, but it should smell heavenly.


Add the egg and egg yolk and beat on medium speed for 3 minutes, until its silky smooth. Add vanilla extract and beat for about a minute or until evenly mixed.
With mixer on low speed, add the dry ingredients. Beat until just incorporated. Remove the bowl from the mixer and use a spatula to fold in the toasted coconut and chocolate chips. Dough will be thick.
Bake cookies immediately. Spoon balls by the tablespoonful onto the prepared baking sheets. Bake for 10 to 12 minutes, until golden brown but still slightly soft in the center. Remove from the oven. Allow the cookies to cool on the pan for 5 minutes, before removing to a wire rack to cool completely.

Only One Left...


C 6/5. Seriously. Fresh out of the oven. These will make your life better. And fatter. But mainly better.
K 3/5 (although she doesn’t like coconut, and ate one of the aforementioned ‘frozen dough’ cookies)

Cake Balls

13 May

If you read any baking blogs, we’re sure you’ve heard about these treats. Little balls of rich cake, on a stick? Even starbucks is making them now. We also jumped on this bandwagon, using  two boxes of the Duncan Hines cupcake mixes, because K voted for chocolate cake, and C voted for funfetti ( she’s about seven years old on the inside. She will fight you if you say that you can’t taste the sprinkled fun in funfetti.)

We also made homemade cream cheese frosting, but any kind of frosting, homemade or not, works. If you haven’t gotten the point yet, this is a very flexible recipe.

Some kind of cake+Some kind of frosting+chocolate coating=cake balls

Recipe follows

Continue reading